Since 2006 the Saiga-12 has seen increased popularity by competitive and recreational shooters. The ability to rapidly reload by changing magazines rather than stuffing shells in a tube is the source of the Saiga-12’s popularity. There currently is no other detachable magazine fed shotgun commercially available for civilian purchase in the United States.
One thing most people will immediately notice about using the Saiga-12 is that it does not load as easily as a traditional AK-47 pattern rifle. While the Saiga-12 is based on the AK receiver and action it is important to remember it is not the same as a regular AK. Due to the difficulty loading a full magazine with a closed bolt, later model Saiga-12s included a manual bolt hold open device. The shooter could activate it by pulling back on the bolt handle and pressing up on a tab located by the trigger at the same time. While this did make loading easier, it also slows down the loading process.
I began using the Saiga-12 competitively in late 2006 and initially used the manual hold open for reloading. I used this technique until I wore out my bolt hold open in the middle of the 2008 Rocky Mountain 3-Gun match. The bolt carrier had gradually cut a channel on the side of the bolt hold open and was allowing the bolt to slide past. Out of necessity I learned how to load on a closed bolt during the match. Without practice, my technique was less than ideal.
After that match I found that the factory fire control parts were well worn in addition to the bolt hold open. I decided to do a pistol grip conversion to that gun, since the fire control needed to be replaced anyway. I had a replacement bolt hold open, and installed it as well. I quickly discovered that leaving the bolt hold open in place with standard AK fire control parts prevented the hammer/trigger spring from fully expanding to the sides of the receiver. The right hammer spring leg could jump out of position and prevent the trigger from resetting all the way, resulting in a dead trigger. I believed that removing the bolt hold open was a necessity for the sake of reliability. I also began to work on my reloading technique so that I could consistently seat the magazine without having the bolt locked back.
Step by step how to load on a closed bolt
1) Carry your magazines shells up. You should do this anyway as re-orientating a Sagia-12 magazine carried shells down is not ergonomic or time efficient.
2) Accept that the Saiga-12 will not load the same exact way as an AK-47. The angle of entry for the magazine into the mag well is much higher than with an AK-47.
3) Consistently grab the magazine in the same location every time.
4) Seat the tab first
5) Push forward hard while rotating up to keep the tab seated. Failure to do so will allow the magazine to pop out.
6) When the magazine is rotated into position you are compressing the shells down into the magazine. It may be easier to load with 9 in a magazine rather than 10 consistently. I prefer to download to 9 for this reason and the gun seems to more reliably feed the first round out with 9 + 1 in the chamber than 10 + 1 in the chamber.
Having used this technique for a few years now, I believe that the bolt hold open devices and bolt modifications are unnecessary for reliable and efficient reloading. The fewer modifications your Saiga-12 has, the more reliable it is likely to be long term.
The number one reason people tell me they don’t want to shoot 3 Gun is because they don’t have/don’t want to buy a shotgun just for shooting a game. I have heard this more and more over the past 5 years.
There are 3 major things contributing to this: 1) We have a large pool of people coming back from the global war on terror, who have bought carbines similar to the ones they were issued, and want an outlet to practice the martial skills they learned and used. Very few of these people actually used shotguns, and those who did will admit their limited utility.
2) The focus in commercial defensive/tactical shooting schools is entirely geared around rifles and handguns now, there aren’t as many tactical shotgun classes taught anymore by comparison.
3) Expense: one less gun makes it that much more affordable to compete in both initial equipment investment and ammunition costs. While people may own shotguns, few are optimized for shooting 3 Gun. Competitive 3 Gun Shotguns are somewhere between a home defense shotgun and a hunting shotgun. 21-24″ barrels with chokes and full length or longer magazine tubes are the norm. The ammunition carrying equipment to be competitive is also increasingly impractical for anything other than competing. The shotgun is consequently viewed as much more specialized equipment than rifles or pistols.
I think its time for local groups to start pushing Rifle/Pistol matches, and perhaps a national level match with just these two firearm types.
The American Confederation of Tactical Shooters Arizona contingent runs monthly matches with consistently good turn outs for local level events (40-60 shooters). It is strictly a rifle/pistol match, with many of the stages combining physical challenge elements, and the stages are often based around real world incidents. The demographic of shooters at that event is different than most of the other matches I attend; the mean age is younger, and more active duty military, veterans, and Law Enforcement attend it. There are also more people attending who have paid for commercial training that want a monthly event to keep their skills sharp.
Whether it is tactically based or more sport oriented I think there is a market for Rifle/Pistol matches.
Edit: 12-16-2012 Since the writing of this entry, ACTS-AZ has become 2 Gun Action Challenge https://twogunaction.squarespace.com/
Posted inCompetitions|Comments Off on The Case for Rifle/Pistol Matches
The round count at Ironman is about 3 times that of traditional 3 gun matches. All of the stages use all 3 guns, and typically have required 30-60 pistol, 30-60 rifle, and 30-40 shotgun rounds if you don’t miss. Carrying 50% more than the minimum is a good idea to accomodate for misses or malfunctions.
The Ironman 3 Gun features Trooper division, where equipment is unlimited, but you must carry it with you for the entire match stage to stage (for full trooper rules read here). The high round count and physical stress of the courses make the Saiga-12 a distinct advantage over a tube fed shotgun in Trooper division. Even if someone is a fast tube fed loader, it becomes difficult to maintain loading efficiciency over 30-40 shells as fine motor skills degrade.
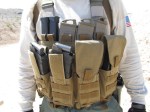
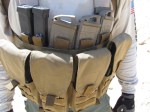
Coyote Tactical first made a Saiga-12 Trooper vest for me for in 2007. I used the same vest through 2010, and we modified it several times to incorporate new features based upon changing operational requirements and things I learned using it over that time period. The vest held up great, but we reached the point where it would be easier to start fresh with a new design than keep modifying the old one.
The new design incorporates features I wanted based upon running the Saiga-12 in competition since 2006, and optimization for use in Trooper division at Ironman.
Features:
Carries four 10 round Saiga-12 magazines
Saiga-12 mag pouches come down low enough on the sides to allow for a full hand grip on the magazine when grabbing it out of the pouch. Magazines are carried shells up for loading efficiency.
Flaps for the pouches are adjustable in height to accommodate smaller capacity magazines. Flaps can also be tucked behind the magazines for faster reloading sequence on stages requiring minimal movement.
Carries three AR15 magazines and two Glock 30 rounders tiered above the Saiga-12 mags. They are retained by elastic sewn into the pouch. The height difference between the mags prevents the mags from interfering with each other in reloading.
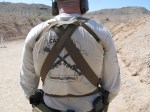
H-style support harness for greater comfort and stability than X-harness style.
Belt keepers on the front to hold the vest down and keep it from riding up.
I was able to used the vest at the Phoenix Rod and Gun 3 Gun Match
Local matches are organized practice/training sessions, and that’s generally what I use them for.
I Identified 3 things I needed to fix at this match
1) My shooting gloves had some fuzzy stuff on them that the velcro on my mag pouch flaps could bind to. It slowed down my reloads on one stage. I took a lighter to them after that stage to eliminate the problem.
2) I haven’t shot a Saiga in almost 10 months, I need to get used to the bore offset again with the red dot; more practice
3) My Saiga malfunctioned twice with failures to eject. I cleared them quickly by racking the bolt. The trigger was also behaving strangely. After the match I found that the right side leg of the hammer/trigger spring had moved out of position causing the trigger to reset slowly. I bent the spring and fixed it and it function tested fine after that.
Posted inGear, SAIGA-12|Comments Off on Coyote Tactical 3-Gun Trooper Vest
Action competition shooters have been using a support arm extended hold for some time now. The reason for this is it allows the shooter to drive the gun target to target faster with less over travel. The more mass that is forward on the rifle, the better this technique works. Extended hold has gained more attention recently with Magpul Dynamics training DVDs. There are also now multiple instructors that are former/active special operations that are teaching it as a practical technique.
In September/October of 2010, there was a debate raging on a local shooting forum about extended hold. Some people believed it was only for “gamers”, lacking in practical value, and did not offer an appreciable advantage over mag well hold.
Mark P. (one of my local shooting cohorts) and I decided to run a test to see how much faster extended hold vs mag well hold was; speed being the primary advantage to using extended hold. Here is his write up of the test.
——————————————————————————————
We would evaluate both methods under controlled conditions using a shot timer and film the event for posterity.
Four test subjects were used including a female with no experience. This was her first time shooting a carbine of any type and her second time on a shooting range.
The other 3 subjects had varying levels of commercial training and competition history. Of those, two were veterans with OEF/OIF deployments.
The nature of the exercise, to determine which ‘hold’ allowed the shooter to transition laterally from one target to another on a level surface. Near and far ranges were tested to get an overall evaluation.
The target used was an IPSC official CLASSIC.
To remove any variables, it was decided to shoot targets from left to right with one shot each.
No effort was made to penalize the shooter for missing the target (only the novice shooter had the occasional miss).
The participants made every effort to score an ALPHA hit as quickly as possible.
Equipment
Cav Arms lowers were used on three of the four weapons. A conventional lower was used on the last.
The female used a dedicated 22lr on a CA lower.
Two of the CA rifles had midlength direct impingement (DI) uppers with rail hand guards.
Cav Arms lowers are fixed A1 length with a 13” LoP.
The conventional lower had a carbine (DI) length upper with a surefire forearm with integrated light system.
All carbines employed the use of a red dot sight (RDS) and A2 flash hiders.
Drills
Drill One:
Conducted at a range of 25 yards with targets set at 15 yards apart . This created a shallow arc of movement.
Shooter centered between targets.
Shot strings was fired alternating between the extended and magwell hold.
The shooter started facing the left target and shot one round at each target.
Drill two:
Conducted at a range of 7 yards with the shooter centered between the 2 targets, thus creating an arc of about 160 degrees.
The shooter starts facing the berm center and upon the start signal, faces the left target, shoots and then engages the right side target.
The same protocol was used as drill one, varying strings between holds.
To determine if stock length had any measurable effect, I tested Drill two with the stock at full extension and again in its normal position.
Two subjects also ran drill two with body armor to determine it’s effects on the exercise.
Results:
The extended hand position on the forearm resulted in faster transition times for all four subjects. While there was the occasional string where the magwell hold was faster, by averaging the string times – the extended hold prevailed in every case. Anywhere from 0.1 to 0.29 seconds were gained by using the extended hold.
Granted, this was a small group sample with a narrow range of experience but we were able to see a trend developing.
Evaluators comments concluded that by using MW hold, the weapon would over track the target and extra time was necessary to recover.
The female shooter commented that by using the extended hold, the weapon was “more balanced.”
(Note; while the intent of using the 22lr for her was for familiarization purposes before using the center fire version, it was decided to remain with the low recoiling carbine to stay consistent with her experience level. She did decline the opportunity to fire the full size version after the testing).
When wearing body armor, the center of gravity of the weapon is placed forward away from the shooter. Adjustable stocks can compensate for this and hold the advantage for shooters of varying stature.
What does this all mean and why should I care?
To paraphrase Magpul Dynamics, a gunfight is a “time-is-life” scenario, do you want to give away up to 0.2 seconds to your opponent ? The faster you eliminate your opponent – the less time you spend engaged in that fight. It may not reduce your injury threshold, only your exposure time in the event for that particular target. As a shooter, it is up to you to determine the right ‘tool for the job’ and evaluate what works best for your particular circumstance. The magwell hold is still viable, especially in tight/confined quarters using a sub gun for which it was developed. It remains up to the operator to know when to apply each method.
Raw results
Shooter drill Extended Magwell Conclusion
String Remarks
1 Matt 1 2.22 2.73
2 Matt 1 2.35 2.45
3 Matt 1 2.16 2.48
4 Matt 1 2.55 2.15
5 Matt 1 1.99 2.22
Total 11.27 12.03
Avg. Difference 0.152 Extended Faster
String
1 Maya 1 2.51 3.05
2 Maya 1 2.68 2.7
3 Maya 1 2.79 2.73
4 Maya 1 2.76 3.25
5 Maya 1 2.00 2.58
12.74 14.31
Avg. Difference 0.272 Extended Faster
String
1 Russell 1 2.01 2.35
2 Russell 1 2.06 2.11
3 Russell 1 1.96 2.01
4 Russell 1 2.03 1.99
5 Russell 1 2.04 2.15
10.1 10.61
Avg. Difference 0.102 Extended Faster
String Drill Ext MW
1 Mark 1 2.46 3.08
2 Mark 1 2.23 2.32
3 Mark 1 2.15 2.56
4 Mark 1 2.15 2.21
5 Mark 1 2.33 2.19
11.32 12.36
Avg. Difference 0.208 Extended Faster
1 Matt 2 2.44 2.52
2 Matt 2 2.23 2.25
3 Matt 2 2.16 2.36
4 Matt 2 2.06 2.28
5 Matt 2 2.16 2.2
11.05 11.61
Avg. Difference 0.112 Extended Faster
Mag well hold has it’s place, it is generally most effective with short guns with less mass out front and correspondingly with forearms that are too short to hold effectively. It can also be a necessity if someone is forced to use a stock that is too long, while wearing armor or cold weather clothing, particularly with an optic with limited eye relief. In that set of circumstances holding out far on the fore end is a physiological impossibility for most people, and mag well hold is required. Another valid reason to run mag well hold is because it allows the shooter to square up and present more of their armor to a potential threat, and access some of the controls with the support hand.
I personally prefer extended hold because it is faster and is more consistent in viability across a wider range of shooting problems. The support hand is always in the correct location to activate light switches. For the circumstances where it is necessary to bring the support hand in closer such as going kneeling or prone, it is simple to slide the hand back while moving into position. Likewise when shooting on the move at extreme angles the support hand can be collapsed in to allow for proper body geometry for a wider arc of fire.
Understanding the why behind different techniques is a critical component of knowing when they should be employed. There are advantages and disadvantages to every technique, its up to the shooter to determine which one most effectively solves the shooting problems they may face.
Posted inTraining|Comments Off on Speed Test Extended Hold vs Magazine Well Hold.
I’ve shot hundreds of 3-Gun Stages over the past 10 years. National level matches allow match organizers the time and resources to do things that aren’t possible in club level events. There have been some pretty cool stages at these larger matches, but none have come close to the level of awesome as the blind stage at the 2009 Ironman 3 Gun Match.
We knew very little going into this stage. We would only be bringing our pistol with us, and we would find pick up guns throughout the stage.
I found and neutralized all the targets
I liked this stage for several reasons
1) It tested the shooter’s mindset in dealing with an unknown situation, and ability to scan for targets
2) The use of pick up guns was appropriate and tested the shooters ability to adapt to equipment other than their own. The size and distance of the targets was reasonable given that we were not using our own equipment.
3) This was a truly unique stage design and scenario, and I’ve not encountered anything else of the same size or scope before or since.
In October of 2009 a debate was raging on one of the local shooting forums as to how reliable AR15s could be when exposed to dirt and debris in desert environments. I have always believed that AR15s are more reliable and can deal with more fouling than they are given credit for as long as they are well maintained. I decided to make these videos at the time to show that the AR15 type rifle is more capable of operating in adverse conditions than it is given credit for.
The rifle I used was a CAV-15 MKII lower with CMMG 5.56mm NATO lightweight upper. This is one of the cheapest rifles someone could possibly build. At the time this rifle would cost less than $600 retail.
This is the first test:
The rifle worked flawlessly for the entire test
One of the immediate criticisms I received was that the test should be done with the dust cover open. I made a second video doing exactly that:
The rifle was NOT cleaned between tests, and again it worked flawlessly.
I would not expect the rifle to work with this level of abuse day after day, particularly without cleaning and without regular armorer level maintenance. There are a number of small parts on AR15 that need to be replaced on a regular maintenance schedule based on the number of rounds fired; the longer parts are used past their intended service life the less reliable the rifle will be. Magazines needs to be cleaned regularly, and replaced as well.
I received a lot of hate mail at the time for making these videos, and still do receive some occasionally. The videos speak for themselves, properly manufactured and maintained AR15s can work in adverse conditions. “Haters gonna hate” as they say.
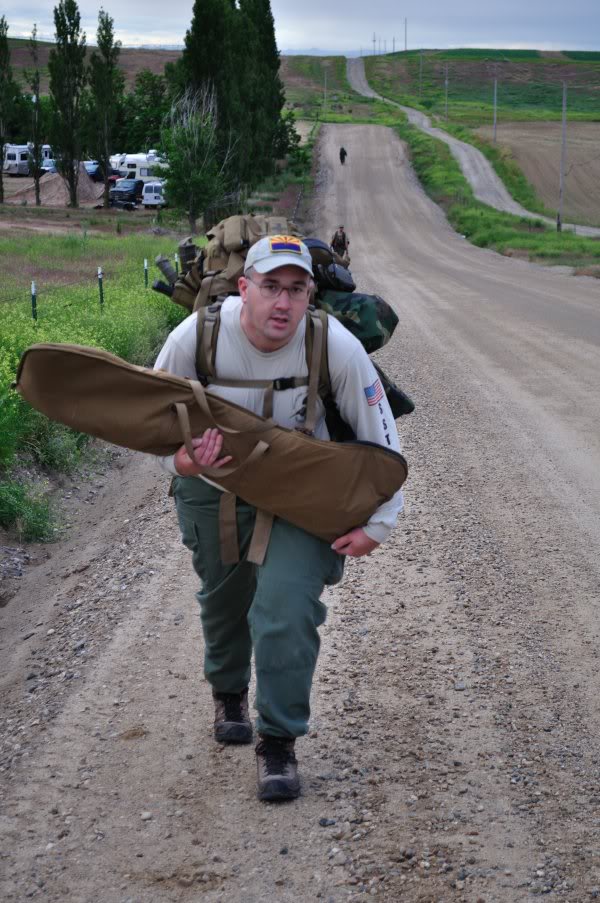
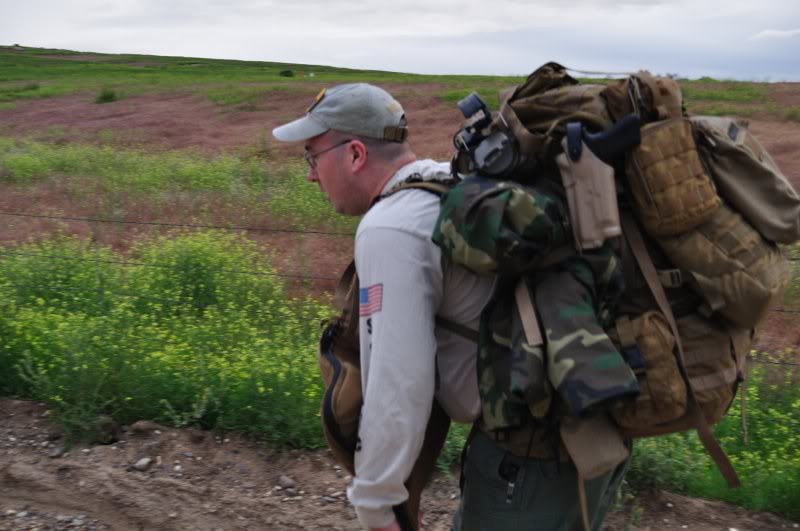
June 10th-12th, 2010 I competed in the Ironman 3 Gun Match in Parma Idaho. The Ironman 3 Gun is unlike most other competitions in that it has a round count roughly 3 times normal matches, and it is physically demanding with stages requiring shooters to sprint up to several hundred yards and carry heavy things. To make it even more difficult, I compete in Trooper class; where we are required to carry all of our gear from the start of the match to the end of the match stage to stage and we cannot resupply anything outside of what we store in a standard ammo can size at the Trooper Gear Check Point. Equipment is completely unlimited; competitors can use any gear they want as long as they can carry it.
Doing the long hike up the hill to Stage 10:
This was also the first major match I used my OST-TSD modified Glock 34
In my modified Safariland Holster:
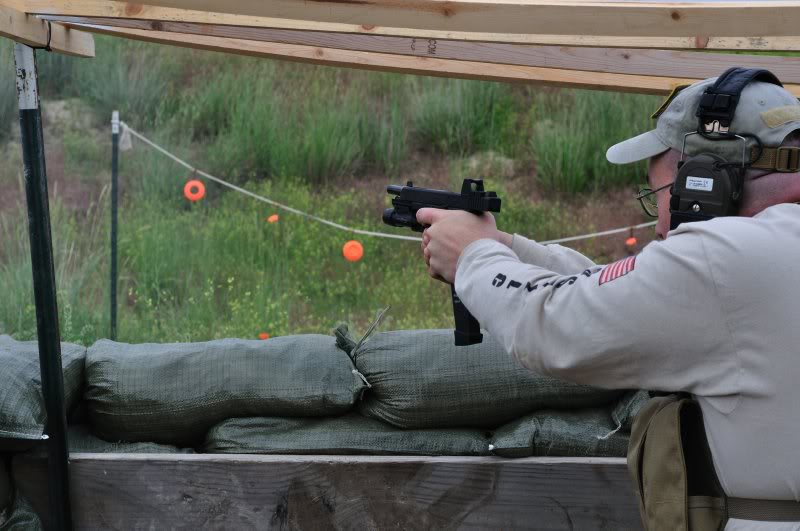
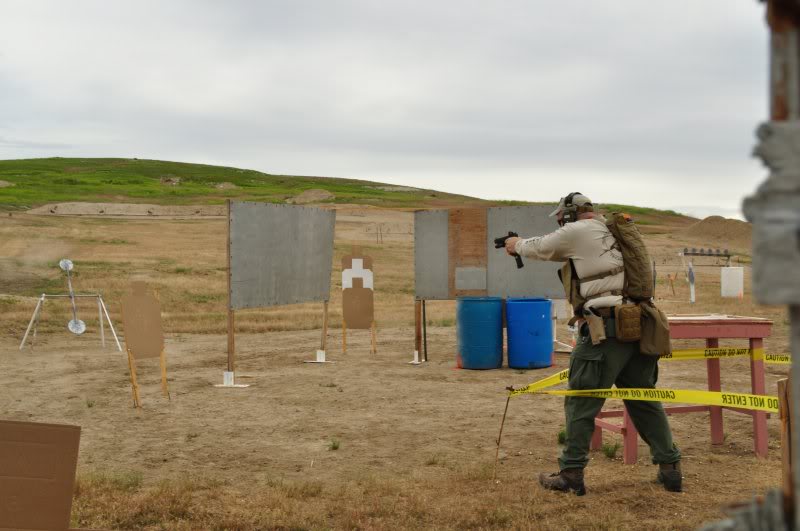
Some action shots:
I do believe the RMR equipped Glock made much of the pistol shooting easier for a several reasons:
1) Simpler sight picture: The dot was much easier to use on small and moving targets than traditional sights. Putting the dot on the target was easier than alligning sights and tracking moving targets. It really made targets like the double spinner (the shooter must rotate it 360 with correctly timed hits) easier to engage.
2) Knowing when not to pull the trigger: The dot may be bouncing around a lot after sprinting a couple hundred yards, but it gives you more information on your stability to make a shot than traditional sights where the movement is not as obvious.
3) Speed increase using the RMR equipped glock was the net effect increased accuracy: I needed fewer shots to successfully engage all the targets.
The one downside to having the RMR equipped Glock was that the lens accumulated sand simply being in my holster. Parma, ID has very fine talcum powder sand and there were high winds all 3 days of the match. It never accumulated enough sand to be unusable, but it was enough to reduce effectiveness. Fortunately I was able to blow the sight off and use a lens wipe before every stage. Even covering the pistol in the holster with a spec ops brand recon wrap allowed sand to accumulate. I think a purpose built field/duty style holster would need to completely cover the rear of the sight.
I ended up 3rd place in Trooper this year out of 24 competitors.
In total Time: Chuck Anderson 1989.61 Iain Harrison 2022.47 Russell Phagan 2120.21
In Match Points: Chuck Anderson 845.42 Iain Harrison 800.15 Russell Phagan 768.25
The main thing that caused me grief this year was intermittent feeding issues with my Saiga-12 costing me at least 100 seconds in penalties from missed flying clays (10 clays at 10 seconds each). But that’s another story.
I consider this first major test of my RMR equipped Glock a success.
The American Confederation of Tactical Shooters Arizona division hosts monthly Rifle/Pistol Matches at the Pima Pistol Club on the 3rd Saturday of every month.
ACTS distinguishes itself from traditional action shooting sports in stage design. The stages often incorporate physical challenges, awkward shooting positions, support side shooting, strong hand only shooting, and other elements that make it generally more challenging than traditional multi-gun shooting.
ACTS is one of the few venues where equipment really doesn’t matter. People have won the match before with equipment as simple as Mini-14s and AK with Iron Sights. In general I think running a red dot sight at ACTS is a distinct advantage given all the awkward firing positions. Optics with magnification and limited eye relief are something I would generally view as a disadvantage for ACTS. You will encounter limitations with equipment at ACTS matches that will not be found in traditional 3-Gun/Multi-gun.
The unique stages ACTS offers has resulted in ever increasing match attendance drawing in participants who are traditional action shooting competitors, students of tactical training schools, and military and law enforcement personnel.
2-19-2011 ACTS Tucson AZ
1st Place Overall and 1st Place Enhanced this month out of 40 shooters.
This month’s match gave the shooter choices on every stage. Generally they were between a physical challenge with easier shooting, or no physical challenge and more difficult shooting. I picked the physical challenges; my strategy + ongoing physical fitness routine paid off.
3-19-2011 ACTS Match Tucson, AZ.
2nd/46 overall. 1st Enhanced Division.
This month’s match was all support side shooting. I’m naturally a left handed shooter, so I shot all right handed.
4-16-2011 ACTS Match Tucson, AZ
1st place Open, and 1st/58 shooters over all this month
My rifle is a CMMG 14.5″ Midlength upper with permanent flash hider, Aimpoint T-1 Micro and Cav-Mfg furniture.
My pistol is a Glock 34 with Trijicon RMR installed by One Source Tactical
Posted inCompetitions|Comments Off on ACTS February-April 2011
I had Coyote Tactical make this vest to my specifications back in January of this year
It may be over kill for most matches, but if you’re going to be a tube-fed Ironman Trooper its probably just enough.
Its purpose built for carrying the California Comp Works carriers. The CCW carriers are the UM84 style; there is a 2.75″ section of rigid nylon underneath for them to attach to. They are easily removable if I’m not using a shotgun. The vest has two duty keepers that tie into my pants belt and duty belt the prevent it from riding up when ripping out the shells. The suspension system is an H-harness style to distribute weight better and avoid pinching the back of the neck.
The AR mag pouches are kydex lined to retain the mags. They work with PMAGs or USGI.
The mag carriers and shell carriers are offset to the right because I am left handed (reload with right hand)
The left side of the vest has a removable pouch for first aid supplies available through Cavalry Manufacturing
Posted inGear|Comments Off on Coyote Tactical 3-Gun Vest
The Tiger Valley Tactical Team Match is something unlike any other match open to the public. Competitors work in groups of 4 to solve practical shooting and physical challenges and are graded on speed and accuracy. The stages are set up in such a way that all shooting is done from designated areas, pistols are holstered between shooting zones, and long guns are cleared, thus making it safe for anyone with basic gun handling skills to attend.
This was the 3rd annual match. Shooters who come to Tiger Valley need to be prepared to compete in all weather conditions. The 2009 match was held in June with brutal heat and humidity. The 2010 match was held in high winds, rain, and 40 degrees. The weather for the match this year was ideal; high 80s with relatively low humidity. This made the match more pleasant and no doubt helped it run more efficiently than in years past.
Scoring on the stages was generally time + penalties added in the form of time. Steel could be shot at as many times as necessary to be neutralized, paper targets generally had limited numbers of rounds allowed and only A-zones counted for score.
There are no equipment divisions. The only gun equipment prohibited is red dots on pistols; probably because holsters with retention are necessary here. Teams generally ran rifles that would commonly be found in tac-scope 3 gun division, with bipods added as necessary for some stages. Teams were required to use the same firearms for the duration of the event. Equipment that was to be used on any stage had to be carried on all stages; this included straps, ladders, packs or anything else a team might need to use to complete the challenges.
Day 1
Stage 1
This was the only stage in which shotguns were used. Not everyone needed to use shotguns, it was up to the team to decide how many it wanted to use.
This stage consisted of 5 bays
1. Designated marksman engages suicide bomber tannerite target. The rest of the team moves to cover under fire of remote control paintball gun. Once the DM takes out the bomber, the paintball gun shuts off
2. Shotgun targets
3. Pistol plate racks
4. Shotgun targets
5. Rifle targets at 125 yards. They had to be shot from a prescribed position found on a corresponding stick in front of the engagement area. Standing, kneeling, sitting, or prone
Stage 2:
Obstacle Course/Fire and Movement.
• The team begins on the chopper. Designated marksman engages 3 half torso targets at 200 yards with one hit each. Once neutralized the team starts moving through obstacles
• The team cannot start an obstacle until a shooter begins engaging a paper target at 100 yards from each position. The targets could only be engaged 10 times, only A zones counted for score.
• Obstacles included 8 foot tall sniper tower, window, ramp, 6 foot wall, 8 foot wall.
• At the end was a bunker with steel targets at 200 yards. Two shooters went into the bunker to engage these targets.
Stage 3:
Retreat
1. The team began in front of 8 steel pistol target that had to be hit with one round each; effectively each member shot 2 targets.
2. They then fell back to the 100 yard line and shot 10 rounds for score on a paper target
3. They then fell back to the 200 yard line and shot 10 rounds for score on a paper target
4. They then fell back to the 300 yard line and shot 10 rounds for score on a paper target
5. They then fell back to the 400 yard line and shot 10 rounds for score on a paper target
All movement was done on the clock, winds were pretty strong making the 300 and 400 yards shots difficult. Only A-zones counted for score.
Stage 4
From the second story of a sniper tower, the team had to engage 4 targets, with one at 50 yards, 100 yards, 150 yards, and 200 yards. Each team member picked one target and shot it from one of 6 positions through holes in the wall with 5 rounds from each position. Only A zone hits counted on the paper, and you could not move to the next port until the team member in front of you had moved.
Stage 5
Teams began at the bottom of the 60 foot tall tower. One at a time they engaged 2 x5 pistol steel, then moved underneath the tower to engage 8 more pistol steel, then went to the top with rifles to shoot 2 LaRue targets each.
Day 2
Stage 6
Teams began at the bottom of the 60 foot tall tower. One shooter engaged 2 x5 pistol steel, one immediately moved underneath the tower to engage 8 pistol steel, two immediately went to the top carrying 30 pound fire hoses.
At the top there were four USPSA targets straight down at the base of the tower. They could only be shot 10 times, only A Zones counted for hits.
There were then 4 LaRues at varying distances that each team mate had to shoot one of.
Stage 7: Get to the chopper!
This was like stage 2 in reverse. The catch this time was the team had to carry a dummy in a stokes basket over obstacles rather than going over obstacles themselves.
• Two team mates began in the bunkers shooting down a bunch of steel plates in a simulated building again
• Two other team mates immediately began moving through the low crawl
• At each obstacle a shooter had to knock down a LaRue at 200 yards.
• Obstacles included 4 foot wall, 6 foot wall, ramp, and window.
• At the end the team loaded the basket into the chopper, hopped on the skids and designated marksman engaged 3 half torso targets at 200 yards with one hit each.
Stage 8: The Trench
This was a semi blind stage with a number of USPSA targets that required one A-zone or two hits anywhere to be neutralized. The shooter sprinted 50 yards into the trench then scanned for targets while moving through it. This was run individually, only the faster shooter’s score counted I would estimate about 175 yards of movement total on this stage.
Results:
10 teams showed up to compete. While not as high as the match organizers had hoped, it seemed ideal from as the match ran on time with no delays and there was just enough down time between stages to catch your breath and load magazines.
Dallas SWAT Dominated the match winning 7/8 stages and getting 785 out of 800 match points.
The second place team was also an LE team with 611 match points.
3rd place was team CAV-MFG with 607 match points (so close!). We won the one stage that was purely rifle shooting out to 200 yards with awkward positions.
This was the best Tiger Valley Team match yet, TJ has put some effort into improving the stage designs and making the match run better logistically. The stages generally allowed for more free thinking problem solving than years past and to some degree teams could assign members to different tasks to optimize performance. There still were some points where the team could be limited by the slowest runner or slowest shooter, but much less than before.
The Tiger Valley Tactical Team match is truly the next level in competitive shooting. Combing physical strength, endurance, and agility with team work and shooting creates a better more interesting type of challenge than traditional action shooting sports with a wider set of skills to practice and master. The worst part about the match is that I have to wait until next year to do it again.
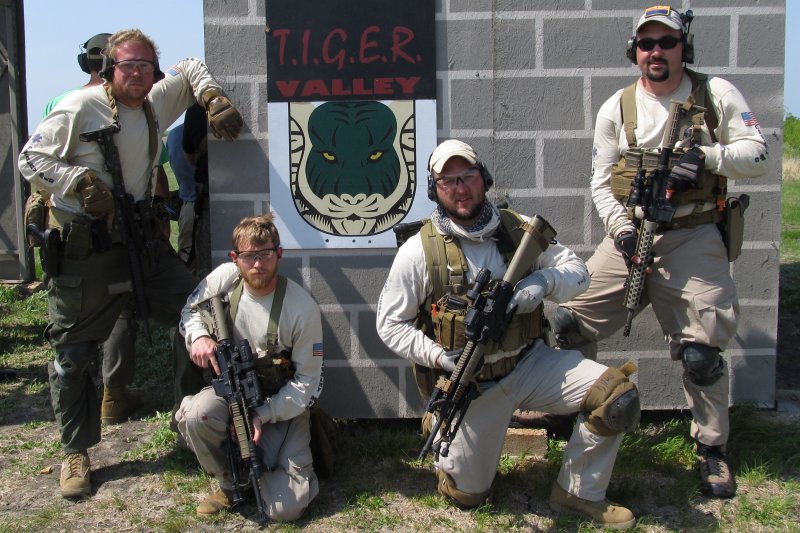
Team CAV-MFG (left to right): Karl (CeramicGod), Matt (Killswitch), Brad (Berd), Russell (SinistralRifleman)
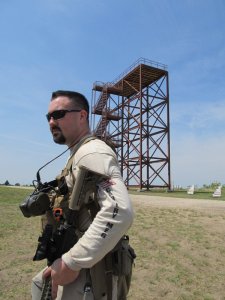
The 60 foot tower looms in the background at Tiger Valley.







You must be logged in to post a comment.